How to Clean Inside Headlights on Your Car? 4 Easy Steps
Headlights are an important part of your car. They help you see at night and in bad weather. But over time, they can get dirty and yellowed.
This can make it harder to see at night and can make your car look old. Luckily, there are a few easy steps you can take to clean inside headlights on your car.
- Open the hood of your car and locate the headlights
- Use a soft cloth or brush to remove any dirt or debris from the surface of the headlights
- Apply a small amount of toothpaste to a clean cloth and rub it into the headlight in a circular motion
- Rinse off the toothpaste with water and dry the headlight with a clean towel
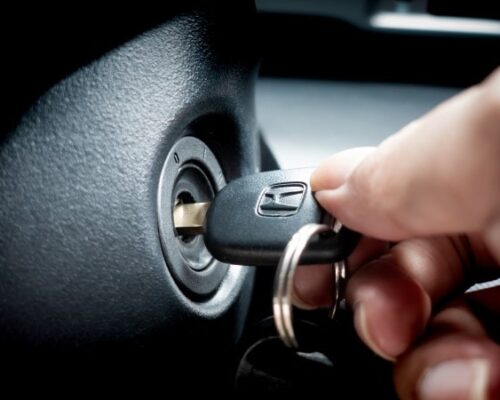
how to remove dust inside headlight/cleaning inside headlight covers/honda stream rn6
How Do I Clean the Inside of My Car Headlights?
Assuming you are talking about the headlight lens and not the actual light bulb:
To clean the inside of your car headlights, you will need to remove the headlight lens. This can be done by carefully prying it off with a flathead screwdriver.
Once the lens is removed, use a cotton swab dipped in rubbing alcohol to clean any dirt or debris from the surface of the lens. You can also use a LensPen to clean your headlights.
How Do You Clean Headlights in a Few Easy Steps?
Assuming you are asking about how to clean the outside of your headlights (and not replace the headlight bulbs):
It’s no secret that over time, car headlights can become dull, yellowed, and foggy. Not only does this affect your ability to see at night, but it also makes your car look old and neglected.
Fortunately, there are a few simple steps you can take to clean your headlights and make them look like new again.
The first step is to wash your car. This will remove any dirt or debris that may be on the surface of the headlights.
Be sure to use a mild soap and avoid harsh chemicals, as these can damage the surfaces of the headlights.
Once the surface of the headlight is clean, you can move on to polishing. There are a number of headlight polishes on the market specifically designed for this purpose.
Apply a small amount of polish to a soft cloth and rub it into the headlight in a circular motion until you see a noticeable difference. You may need to apply several coats of polish before you achieve the desired results.
If your headlights are extremely dull or yellowed, you may need to use sandpaper before polishing them.
Start with a medium-grit sandpaper and gently sand away any roughness on the surface of the headlight. Be sure not to sand too hard or too deeply, as this could damage the headlight permanently. Once you’ve finished sanding, wipe away any dust with a damp cloth and proceed with polishing as directed above.
What is the Easiest Way to Clean Car Headlights?
If you’re looking for the easiest way to clean your car headlights, we’ve got you covered. Whether your headlights are just starting to yellow or they’re already significantly foggy, there are a few things you can do to get them looking like new again.
To start, wash your headlights with soapy water and a soft cloth.
If they’re still not as clean as you’d like them to be, you can try using a headlight cleaning kit. These kits come with everything you need to clean your headlights, including sandpaper of varying grits so you can remove any stubborn dirt or grime.
Once you’ve cleaned your headlights, it’s important to protect them from future damage.
Headlight covers are an easy and effective way to do this. They’ll keep your headlights clean and free of scratches, and they’ll also help protect against UV damage that can cause yellowing over time.

Credit: spy.com
How to Clean Inside of Headlight Plastic
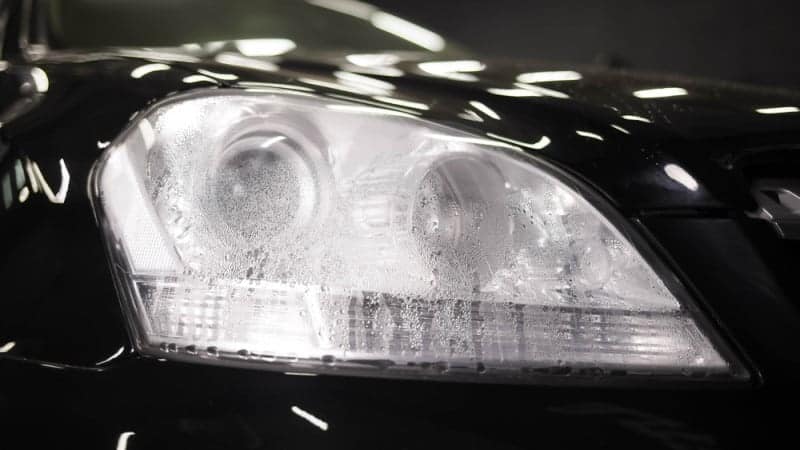
Headlights are one of the most important safety features on your car, and keeping them clean is essential for proper function. Unfortunately, over time the plastic lens can become cloudy and yellowed from exposure to UV rays and road grime. This can significantly reduce the amount of light that is emitted, making it more difficult to see at night or in low-visibility conditions.
Fortunately, cleaning inside of headlight plastic is relatively easy and only takes a few minutes. All you need is some soapy water and a soft cloth. Start by wetting the cloth with soapy water and then gently wiping down the lens.
Be sure to avoid scrubbing too hard, as this could scratch the surface. Once you’ve wiped down the lens, rinse it off with clean water and dry it with a clean towel.
If your headlights are extremely dirty or yellowed, you may need to use a headlight restoration kit.
These kits come with everything you need to restore clarity to your headlights, including sandpaper, polishing compound, and a sealant. Follow the instructions included with your kit to get the best results.
How to Clean Car Headlights Home Remedy
If your car’s headlights are looking dull, yellowed, or just generally dirty, then it’s time to give them a good cleaning. But instead of reaching for a commercial headlight cleaner, try this simple and effective home remedy instead.
To start, you’ll need some distilled vinegar and a clean microfiber cloth.
Pour the vinegar into a bowl and soak the cloth in it for a few minutes. Then, use the cloth to wipe down your headlights. You should see the dirt and grime coming right off.
Once you’re done scrubbing, rinse the area with water and dry it off with a clean towel. That’s it! Your headlights will be sparkling clean and ready to light up the road ahead.
How Do I Clean the Inside of My Sealed Headlights
If you’re like most people, you probably don’t give much thought to your headlights. But when they start looking dirty, it can be a real nuisance. You might be tempted to just ignore the problem, but that’s not a good idea.
Headlights are an important safety feature on your vehicle, and keeping them clean is crucial for maintaining good visibility while driving.
So how do you clean the inside of sealed headlights? The best way is to use a headlight restoration kit.
These kits come with everything you need to clean your headlights and make them look like new again.
Most kits include sandpaper or a sanding disc, polish, and a UV protection sealant. You’ll also need some basic supplies like gloves, rags, and masking tape.
Follow the instructions included with your kit carefully.
In general, you’ll start by sanding away the yellowed or hazy surface of the headlight lens. This will help restore clarity to the lens.
Next, you’ll apply polish to further buff out any remaining imperfections. Finally, you’ll apply the UV protection sealant to help prevent future yellowing or haze from forming on the lens.
Cleaning your headlights is simple and only takes a few minutes per light.
But it’s an important task that will help keep you safe on the roadways!
How to Clean Inside of Headlights Honda Accord
Headlights are one of the most important parts of any car, and keeping them clean is essential for both safety and style. But over time, even the best headlight can become dulled by grime and dirt. Luckily, cleaning your headlights is a fairly simple process that can be done at home with just a few household items.
To clean your headlights, you’ll need:
– A bucket or bowl of warm water
– A mild dish soap
– A soft cloth or sponge
– An old toothbrush (optional)
Start by mixing together some warm water and dish soap in your bucket or bowl.
Then, dip your cloth or sponge into the mixture and gently scrub your headlights in a circular motion. If there are any particularly stubborn areas of dirt or grime, you can use an old toothbrush to scrub them away. Once you’re finished scrubbing, rinse off your headlights with clean water to remove any soap residue.
And that’s it! With just a few minutes of work, you’ll have sparkling clean headlights that will make driving at night safer and help give your car a fresh new look.
How to Clean Inside of Headlights Mazda 3
If you’re like most people, you probably don’t think about cleaning your headlights very often. But if you take a closer look, you’ll notice that the inside of your headlight assembly can get pretty dirty over time. This can cause a decrease in light output and make it more difficult to see at night.
Fortunately, cleaning the inside of your headlights is relatively easy and only takes a few minutes. Here’s what you need to do:
1. Start by removing the headlight assembly from your Mazda 3. This is usually done by unscrewing a few screws or bolts that hold it in place.
Consult your owner’s manual for specific instructions.
2. Once the headlight assembly is removed, take a look at the back of the lens. You should see a small access panel that can be removed using a flathead screwdriver or other similar tool.
3. With the access panel removed, you should now have access to the reflector and bulb housing inside the headlight assembly. Using a clean cloth and some rubbing alcohol, gently wipe down both surfaces until they’re free of dirt and grime build-up.
How to Remove Headlight Cover to Clean
Assuming you want tips on cleaning your headlights:
If your headlight covers are looking dull, yellowed, or foggy, it’s probably time to clean them. Depending on the type of headlight cover, there are different ways to clean them.
Here are a few tips:
-For plastic headlight covers, you can use a toothbrush and soapy water to scrub away any dirt or grime. You can also use a product like Mothers Back-to-Black Headlight Restoration Kit.
-For metal headlight covers, you can use a soft cloth and soapy water to wipe them down. If they’re really dirty, you can use a mild cleanser like WD-40 Multi-Use Product with Rust Release Penetrant Spray.
-If your headlight covers are clear, you can use Windex or another glass cleaner to wipe them down.
No matter what type of headlight cover you have, be sure to dry it off completely before putting it back on the car. Otherwise, moisture could get trapped inside and cause corrosion or other damage.
How to Clean Inside Vw Golf Headlights
You love your VW Golf, and you take pride in keeping it looking its best. But over time, even the most well-kept car can start to show its age. One area that’s especially susceptible to grime and dirt build-up is the headlight housing.
Over time, the headlight lens can become cloudy and yellowed, making it difficult to see at night. Not only is this a safety hazard, but it also makes your car look older than it really is. Fortunately, cleaning inside VW Golf headlights is a relatively easy process that anyone can do at home.
To clean inside VW Golf headlights, you’ll need:
– A small screwdriver or other tool for removing the headlight housing covers (if applicable)
How to Clean the Inside of Projector Headlights
Are your projector headlights looking a little dull? If so, it’s probably time to clean the inside of them. Here’s how:
1. Start by removing the headlight housing from your car. This will give you access to the back of the headlight lens.
2. Next, use a Phillips screwdriver to remove the screws that hold the lens in place.
3. Once the lens is removed, you’ll be able to see the reflector bowl and bulb. Use a soft cloth to gently wipe away any dust or dirt from these surfaces.
4. Now it’s time to clean the lens itself.
The best way to do this is with a commercial headlight cleaning kit, which can be found at most auto parts stores. Follow the instructions included with the kit to clean both sides of the lens.
5. Once everything is clean, reassemble your headlights and reinstall them on your car.
You should now notice a significant difference in light output!
Conclusion
If you’re like most people, you probably don’t think about cleaning your headlights until they start to look dirty. But did you know that clean headlights can actually improve your visibility while driving at night?
Here’s how to clean inside headlights on your car in four easy steps:
1. Begin by mixing a solution of one part vinegar and one part water.
2. Next, use a soft cloth or sponge to apply the solution to the inside of your headline.
3. Once the solution has been applied, use a toothbrush or other small brush to scrub away any built-up dirt or grime.
4. Finally, rinse the area with clean water and dry it off with a towel.