Types of Test Light And How To Use A Test Light?
There are two main types of test light: the incandescent and the LED. Incandescent test lights use a filament bulb that glows when current is passed through it, while LED (light emitting diode) test lights use a small light-emitting diode that emits a bright light when current is passed through it. Both types of test light have their pros and cons, but in general, LED test lights are more durable and easier to use than incandescent ones.
Here’s a closer look at each type of test light and how to use them.
There are various types of test light available on the market, each with their own specific purpose. Here is a quick guide on how to use a few of the most popular ones:
1. Circuit Testers: These devices are used to check whether an electrical circuit is live or not.
Simply touch the probes to the two points you want to test and if the light comes on, then there is current flowing through the circuit.
2. Voltage Testers: Unlike circuit testers, voltage testers do not require contact with live wires in order to work. They can be used to test for voltage even when the power is turned off.
Simply touch one probe to the positive terminal and the other probe to ground (or any other point in the circuit) and if there is voltage present, the tester will light up.
3. Continuity Testers: These devices are used to check whether an electrical connection is complete or not. To use one, simply touch both probes to the two points you want to test and if there is continuity between them, then the light will come on.
This type of tester is often used when checking fuses or testing for shorts in circuits.
4. Load Testers: These devices are used to test whether an electrical device can handle a certain amount of load without overloading or shorting out. To use one, simply connect it between the power supply and your device under test and then turn on the power.
How to test your blood glucose (sugar) levels
How Do You Use a Test Light?
Assuming you would like a blog post discussing how to use a test light:
A test light is a very useful tool that can be used to test for power, or the lack thereof. It can also be used to check fuses and circuit breakers.
Here is a step-by-step guide on how to use a test light:
First, you will need to gather the following supplies: a test light, something to serve as a ground (this can be done by touching the metal part of the vehicle frame), and your desired object to test for power (a fuse, circuit breaker, etc.).
Once you have gathered your supplies, follow these steps:
1) Attach the alligator clip of the test light to the ground.
2) Touch the tip of the probe of thetest lightto the object you’re testing.
3) Ifthetest lighthas acontinuitybeepand/or lights up, then there is power present.
If not, there is no power present.
4) Youcan also usethetest lightto checkforblown fusesbytouching one leadof themultimeter totopofthefuse(the side withthemetal tab).Ifgood,youwill getacontinuitybeep/lightup.Ifthefuseisblown,youwill getno continuitybeep/lightup.
What Can I Test With a Test Light?
A test light is a very useful tool that can be used to test for a variety of things. For example, you can use it to test for shorts in wires, check fuses, andtest for power at outlets. To use a test light, simply touch the metal tip of the probe to the desired testing point and observe the bulb.
If the bulb lights up, then there is power present. If the bulb does not light up, then there is no power present.
What are Different Types of Test Lamps?
A test lamp is a device used to check whether an electrical circuit is working. There are two main types of test lamps: incandescent and fluorescent.
Incandescent test lamps have a filament that glows when current flows through it.
These lamps are usually used for low-voltage circuits, such as those in homes and offices. Fluorescent test lamps have a tube filled with gas that emits light when current flows through it. These lamps are often used for high-voltage circuits, such as those in industrial settings.
Test lamps are available in different sizes, shapes, and colors to suit various applications. They can be purchased at most hardware stores or online retailers.
How Do You Use a Test Light With a Red And Green Light?
A test light is a handy tool that can be used to diagnose electrical issues. It consists of a bulb attached to a wire with alligator clips on each end. The red clip is attached to the power source, and the green clip is attached to ground.
To use the test light, first make sure that the power source is turned off. Then attach the red clip to the positive terminal of the power source and touch the tip of the bulb to the negative terminal. If the bulb lights up, then there is continuity and electricity is flowing through the circuit.
If not, then there is an open in the circuit and electricity cannot flow through.
You can also use the test light to check for voltage at a certain point in a circuit. To do this, touch one lead of the test light to ground and touch the other lead to where you want to check for voltage.
If there is voltage present, then the bulb will light up.
Credit: www.ingeniovirtual.com
How to Test for Ground With Test Light
If you’re working with electricity, it’s important to know how to test for ground. This can be done with a test light. First, make sure that the power is off before you begin testing.
Then, touch the tip of the test light to the ground wire or terminal. If the light comes on, then you have a good ground. If not, then you’ll need to find another spot to test.
How to Use a Test Light on Wires
When testing for a voltage on wires, you will need to use a test light. A test light is simply a tool that allows you to see if there is electricity flowing through a wire. If the light turns on, then there is electricity present.
If the light does not turn on, then there is no electricity flowing through the wire.
To use a test light, first make sure that the power is turned off to the area that you will be testing. Once the power is off, touch one end of the test light to the positive terminal of the battery and touch the other end of the test light to the wire that you want to test.
If the light turns on, then there is voltage present in the wire. If the light does not turn on, then there is no voltage present in the wire.
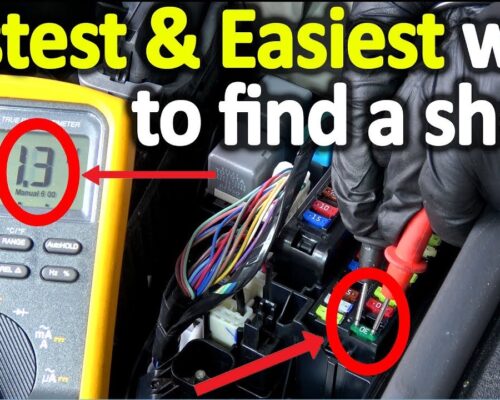
How to Use a Test Light to Find a Short
A test light is a very useful tool that can help you find a short in your electrical system. Here’s how to use one:
1. Start by disconnecting the negative battery terminal.
This will prevent any shorts from causing damage to your electrical system.
2. Next, connect one end of the test light to the positive battery terminal and touch the other end to a bare metal ground point on the vehicle.
3. If the test light illuminates, then there is a path for current flow and you have found a short circuit.
Test Light Red Or Green Meaning
A test light is a very useful tool that can help you determine whether or not there is power running to a particular area. The most common type of test light is a continuity tester, which uses a bulb and two wires. One wire is connected to the ground, while the other wire is connected to the circuit being tested.
If there is power running through the circuit, the bulb will light up.
There are also test lights that use LEDs instead of bulbs. These types of test lights are often used in automotive applications because they can be seen more easily in daylight than bulbs.
LED test lights work in the same way as continuity testers, but they may have different colored LEDs that indicate different things. For example, some LED test lights have a green LED that indicates power and a red LED that indicates ground.
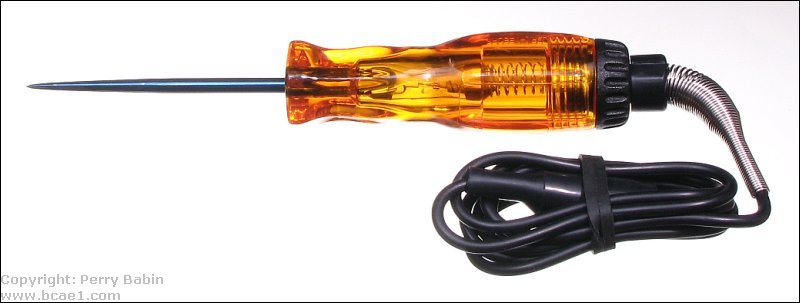
Self Powered Test Light
A self-powered test light is a handy tool that can be used to test for power in an electrical circuit. It is powered by a small battery, and has a built-in LED light that will turn on when the circuit is live. This type of tester is very easy to use, and can be a great way to quickly check for power before working on an electrical project.
Led Test Light
A LED test light is a handy tool that can be used to test for a variety of different things. For example, you can use it to test for continuity in electrical circuits, or to check for short circuits. You can also use it to find out if there is power running through a particular wire.
There are two main types of LED test lights: those that run on batteries and those that plug into an AC outlet. Battery-operated models are more portable, but they may not be as bright as the AC-powered ones. Whichever type you choose, make sure that the light is bright enough to see clearly what you’re testing.
To use a LED test light, simply touch the tip of the light to the object you want to test. If the object is electrically charged, the light will turn on. Otherwise, it will remain off.
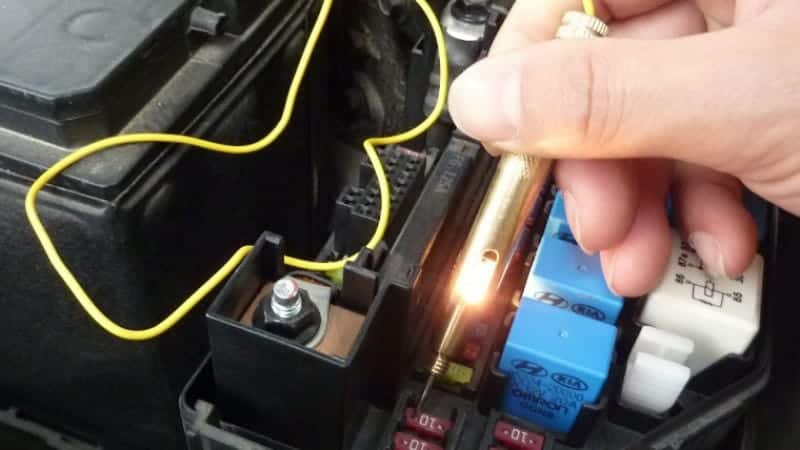
How to Use a Test Light on Fuses
If you’re like most people, you probably don’t know how to use a test light on fuses. Don’t worry, it’s not as difficult as it sounds. In fact, using a test light on fuses is a pretty straightforward process.
Here’s what you need to do:
1. Locate the fuse box in your vehicle. This is usually located under the dash or in the engine compartment.
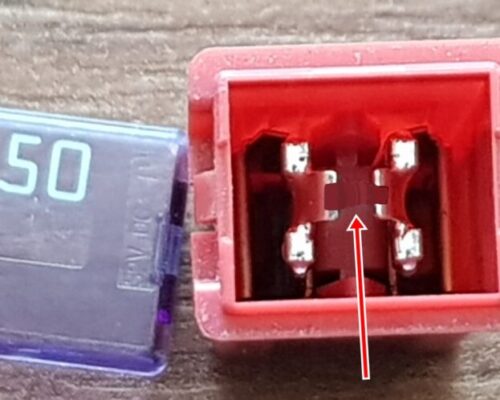
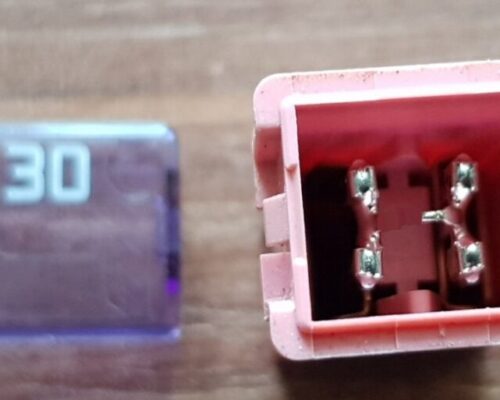
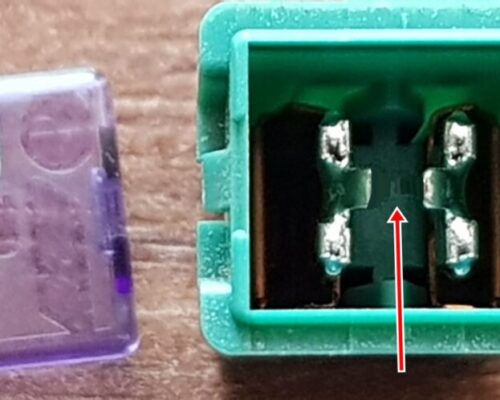
2. Open the fuse box and identify the blown fuse. You can tell if a fuse is blown by looking at it; if the metal strip inside is broken, then the fuse is blown and needs to be replaced.
3. Once you’ve identified the blown fuse, take out the old fuse and insert a new one of the same amperage rating into its place.
4. Close up the fuse box and start your vehicle’s engine to see if everything is working properly now that the new fuse has been inserted.
Light Tester
A light tester is a device used to test the functionality of electric lights. It usually consists of a power source, such as a battery, and a light bulb. The tester is placed in the circuit between the power source and the light bulb.
If the light bulb lights up, then the circuit is complete and functioning properly.
Conclusion
There are three main types of test lights: incandescent, fluorescent, and LED. Each type has its own advantages and disadvantages. Incandescent test lights are the least expensive and most common type.
They’re also the least accurate, because the filament can break easily. Fluorescent test lights are more expensive but much more accurate. They use a gas-filled tube to create light, so they’re not as susceptible to breaking as incandescent bulbs.
LED test lights are the most expensive but also the most accurate. They use a semiconductor to create light, so they’re much less likely to break than either incandescent or fluorescent bulbs.